
Jan 07
Hairy Spider using ‘fluffy-wire’
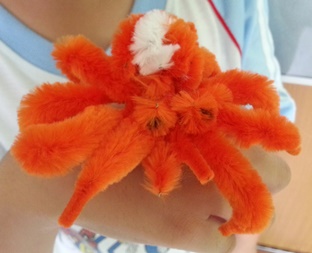
Handicraft for kidsKitkit successfully made his very first Hairy Orange Spider using ‘fluffy-wire’. (I’m sorry, I have NO IDEA what do you call that!!!)
With lots of patience following a tutorial video, plus careful twisting and cutting, Kitkit was so proud of his own Hairy Orange Spider after 15mins. *Thumbs Up*
His first sentence?
“I’m going to bring it to school tomorrow!”

Copyright © 2007-2026 All About Your Child. The contents on this blog are the sole property of the author, Angeline Foong, and may not be used or reproduced in any manner without consent. All Rights Reserved. 1 Comment »


